Wednesday, November 30, 2022

CT200h - Rearview mirror upgrade.

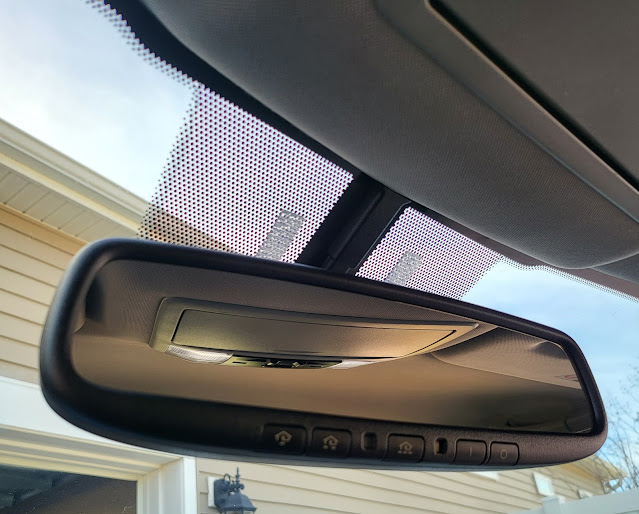
Went to the junk yard over the weekend because there was 2012 Prius listed and wanted to get the EGR valve and cooler assembly along with the intake manifold. Figured if I had a spare I could clean it out to my liking and then swap out the old with the refurbished old parts. Well obviously waited too long, went to the junk yard to find the whole motor was ripped out already. I did see an 09 Prius there with the rear view camera that had the home link and auto dimmer feature in it so got that to see if I could retrofit it into my CT that only had a regular rear view mirror. Also got the wire cover and the connector for the rear view mirror. Wasn't 100% sure if the rear view mounts would be the same but usually Toyota/Lexus cars use parts across multiple platforms if they can so took the gamble that paid off. Same mounts.

These mirrors are made by Gentex and come to find out they make the mirrors for a plethora of vehicle manufacturers. A lot of them also have temp, compass display etc. built in as well. Working with what I have and found the wiring diagram for it as shown below. The 10 wire connector uses the basic 3 connections to work.


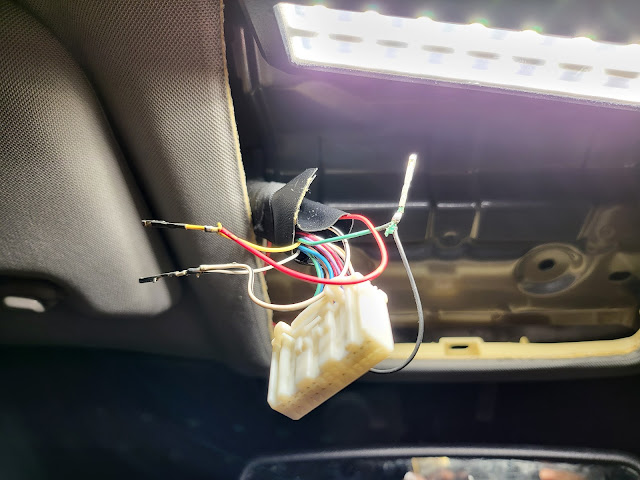
I also wanted to not run wires down the A-pillar etc and wire it to look like it was stock. Was hoping to find a wiring harness already under the upper console but didn't so had to trace the wires needed. The wires needed are the denoted below. Just three wires, Constant 12V, Ignition 12V, and Ground.


Ran the wires from the rear view mirror through the headliner, through the factory loom itself and soldered it onto the corresponding wires of the factory harness. 


Used the wire cover off the Prius as well and everything looks like factory.


Simple mod that can be done for cheap and now I have home link and auto dimming. Everything works as it should and happy. Low key do want the rear view mirror that show temperature and compass. Also do this at your own risk I claim no responsibility if things go south. 

-AJ Abraham


Follow me on Instagram:
@flawless_fitment
@aj_ls460
@aj_lx470 
@aj_sc430
@aj_ct200h

CT200h - Pickup, First wash and mod.

I've been on a hunt for a CT200h off and on for over two years now I feel. I say off and on because when I started in 2020 prices on average were under 10k for a 2011. I kick myself for not picking up a 2015 F Sport up from a private seller then for about 9k. My thought process on picking up any vehicle is to figure out everything that can go wrong with the vehicle, along with all maintenance items needed to bring it up to par. I price out parts, labor needed etc., add that all in a spread sheet and then figure out what I want to spend on a car. So with the CT, a high mileage one, will need a lot to bring it up to par. I accounted for everything, head gasket, main battery, hybrid battery, EGR cleaning or replacement, gaskets, etc. At that point purchasing a used CT for over 15k made no sense to me. It made more sense to just go buy a brand new hybrid Corolla. Well I didn't really need it but just wanted a CT really so I just put it no the back burner till prices for these cars came down. Few friends of mine who are dealers knew I was looking for me and out of the blue got a call saying that one was coming up for auction the next day and carfax mentioned that the head gasket was done 18k prior. He gave me the VIN# and I did my due diligence and found out it was a one owner vehicle with everything done at the dealer since new. It did have a reported check engine light on the auction listing but the body looked like it was in very good condition, same with the interior and excellent service history so took a gamble and gave him a max bid price I didn't want to go over. Well, HE WON IT! He had to pick up another car as well from the auction so I figured we can just go up together and I'd just tow the CT back. Got to the auction and my buddy plugged in an OBDII scanner to check the code and he had a smirk, popped the hood and found the MAF was disconnected, connected it back, started the CT and no more check engine light. 800 miles later the CT was home! 

Although a head gasket was done, there was no history of the EGR valve, cooler or intake being changed out or cleaned. Being serviced at Lexus I was pretty sure no cleaning of these said parts would occur so as preventative maintenance that is on my list. For now I'm just gong to drive it for a bit and see the issues, if any come up and then tackle all the needed maintenance items I had in mind done. 


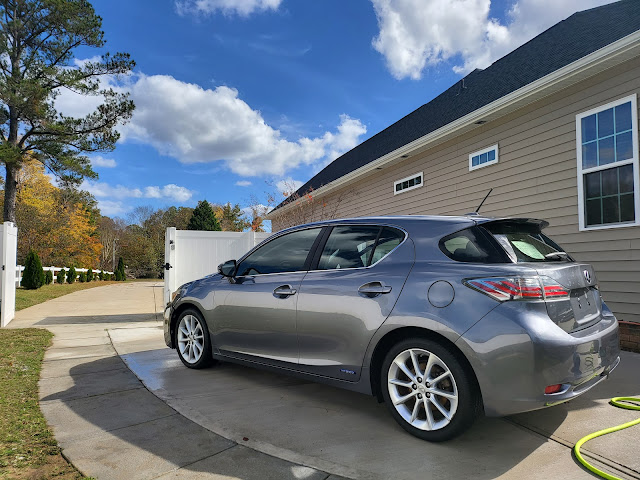
First Wash, don't mind my drying towel on the windshield, it's drying.  


As mentioned before body was in great condition, I found 3 tiny dings that weren't really noticeable. It definitely showed it's age though, outside definitely needs a full detail. The bumper has a tab missing on the driver side so it is not sitting in properly at the fender. Might look into a front end conversion later. The headlights are horribly oxidized, I'll try the sanding, polish and clear method to see how it turns out. If it is not to my liking then I'll probably get some new headlights or at least new lenses if I can find some. Some clay, polish, elbow grease etc. and this will look beautiful.

I had a diode dynamics relay on hand so wanted to add that because I love the soft tap turn signals feature so did that. It was a pain to get my big hands into the tight spaces behind the dash but got it done.


On my LS460 it was easier to access the relay from behind the cluster so removed the CT cluster but was a no go on accessing it. Since I had the cluster out, figured I would just polish the lenses and protect it before putting it back on. 


The cluster being nice and clean lead me to polish the other display area.


A couple of minutes and a whole lot of satisfaction. Also ended up changing out all the interior bulbs and side view mirror puddle light bulbs to leds. Super happy and excited to own one finally. 

-AJ Abraham


Follow me on Instagram:
@flawless_fitment
@aj_ls460
@aj_lx470 
@aj_sc430
@aj_ct200h

Friday, March 4, 2022

LS460 Transmission Flush

I've been putting a transmission off for a long time almost a year really. I kept using the minimal miles I put on it as an excuse. Well a couple of days ago I felt a slight shudder between 1300 and 1500 rpm. Well needless to say that gave me enough motivation to do a flush.

I have a binder full of maintenance records for the car which was completely serviced at Lexus by the previous owner and there were no mention of anything to do with transmission fluids. This would mean at just over 170k miles the fluid is still the original fluid. 

I've been prepping for this, these are the parts I had ordered:

- Amsoil Signature Series Automatic Transmission Fluid (ATL) 16qt x 17.5
- Seafoam TT16 - transmission 
- Toyota Transmission Filter - 35330-50030
- Transmission Pan Gasket - 35168-50010
- Transmission filter O'ring - 90301-31014

My process in the past has been:

- Drain transmission pan
- Drop transmission pan
- Remove filter
- Clean transmission pan
- Refill the transmission with the fluid that was drained.
- Flush fluid 

For the fluid flush in the past I had access to a fluid flush machine but now I don't. If I disconnect the transmission return line from the radiator and switch the car on it would start circulating the ATF and start dumping fluid out of the line. I just needed something to pump fluid back in. This is where I found an oil change pump extractor. My thought process was that I can just put all the new ATF in a container, drop a hose into it and connect that to the suction side of the pump and then connect the the dispensing side of the pump to a hose which would connect to the transmission return line. I would also connect the return line from the transmission cooler into another container to collect the old fluid that was being pumped out. I connected the pump to test it out and it moved the ATF pretty quickly. Just wasn't sure if it would match the speed at which the old ATF was coming out. I obviously did not want the transmission to run dry I figured the thresh hold I did not want to go under was 80% fill rate. Which means if 1qt is dumped out I do not want to be below 0.8qts being filled at the same time. I figured the transmission is not under any load so 80% would be safe. 

For my setup I ended up with a chemical resistant 5 gallon garden sprayer that I modified slightly to accommodate for the connectivity of the hoses to the electric pump. To catch the fluid that was being dumped out I ended up using a 5 gallon water dispenser container. I marked both containers to show quart levels to see how close the rates of dispensing to fill were.


This was how I planned and finally did connect everything. Excuse the rough sketch up.


Enough of theory, onto the process. I clearly didn't have much time to document everything but stuck to my tried and true method previously outlined. Not going into detail about this because it is well documented.

I made sure I had no issues taking the fill bolt out, please do this first. If you cannot fill through this method you would have to pump 4qts of fluid using the electric pump as outlined above without the car being turned on so it doesn't dump fluid out. Taking the fill bolt out should not be an issue, if it is I suspect you have bigger issues that might need to be addressed.

Drained the fluid from the pan and then undid all the screws for the pan except for two towards the front of the car. There is still oil in the pan so if you just pry it off you are going to have a huge mess (my past mistake). Pry the pan side towards the back of the car and slowly detach it from the transmission but still hold onto that side with your hand so it doesn't fall. once you slowly pry the pan off the proceeded to now loosen the two screws that weren't fully undone. Slowly tilt the pan and the fluid in the pan will start draining. I collected all this in a container and there was very minimal fluid loss on the ground. Don't put away that catch container yet, still have to remove the filter. There is a gush of fluid that will come out when you drop the filter (past mistake again). I had just about 4 quarts collected. 


Before I put in the new filter I sprayed down everything with seafoam transmission cleaner. There was almost a thin film that almost looked like soot and the seafoam cleaned all that right off. Make sure the old o-ring from the old filter is out. Also make sure there is a new o-ring on the new filter. The filter does not come with the o-ring and will have to be ordered separately. 


Once all that is done and the pan and magnets are cleaned put everything back. Torque for the transmission pan bolts are 9ft./lbs. I filled 4 quarts of Valvoline Maxlife ATF to fill the transmission up with ATF that was drained. I used Valvoline because it was cheaper than Amsoil ATF. This was getting drained out anyway but just wanted something to crank the car up bring it to temperature and shift through all the gears safely. The transmission holds 12qts in total and 4 being drained out and refilled will also give it a higher percentage of fresh fluid in the transmission, ,my thoughts on it anyway. 

With the transmission filled, cranked the car up and slowly shifted through the gears. Turned the car off and then connected the hoses as outlined above. A friend of mine was doing most of the grunt work really so he was under the car while I turned it off and on etc. (thanks Matt). With everything hooked up turned the car on again and started the electric pump almost immediately. The fill rate was almost equivalent to the dispensing rate so we just ran the car and the pump till we saw clean red fluid coming out. This was around the 10 quart mark, proceeded to flush another quart through to be safe and then turned the car off. After the car was off we pumped in another quart of fluid so there is more than enough in the transmission. We are going to drain the excess after the transmission fluid reaches temperature. Hooked up the OBD2 scanner to show live data and then cranked up the car again after everything was buttoned up. To properly check fluid the transmission fluid should be between 95 and 108 degrees Celsius. Crank the car up and shift through the gears slowly. Once the temperature reached about 105 degrees Celsius in my case I pulled the fill level plug. Once the stream of ATF slows down to almost a gurgle put the plug back in and button everything up. You are done at this point. 

Just some pictures of my contraption.


I bear no responsibility for anything going wrong here guys.. do so at your own risk. This is just a guide to what I did.


-AJ Abraham


Follow me on Instagram:
@flawless_fitment
@aj_ls460
@aj_lx470 
@aj_sc430

Monday, January 31, 2022

LX470 Header & Suspension refresh

Been stocking up on parts slowly with plans on refreshing the LX this included some Doug Thorley headers. I can hear that the issue currently, either the header has a crack in it or the header gasket is shot. My mentality on maintenance is while I'm in there... so with that thought process in mind I was planning on replacing the following while changing out the headers:

Doug Thorley Short Tube Headers - 98-04 - THY-561-SS-C
(2) Manifold Gaskets OEM 17173-50021
(0-16) Manifold to Cylinder Head Studs OEM 90126-10015
(2) Header to Cat gasket OEM 90917-06065
(16) Header nuts OEM 90179-10070

While the headers are being done there are parts that make sense in changing while it is getting swapped out so the following parts were on the list.

Engine mount L& R (12361-50121 x 2) 190.87 X 2
Engine Stabilizer L& R (12381-50100 x 2) 53.15 X 2
Transmission mount (12371-50081)
Front stabilizer end links

I currently don't have room to have a vehicle down or work on over a couple of days so I waited for a friend of mine who is a really good tech to have some time to install these parts. There are maybe a handful of people that I trust to work on my vehicles. After a short wait he got me in, Well in about 4 hours he had the headers done, end links, motor and transmission mounts & diff arms and bushings done. While he was doing all that up front I got the rear lower control arms, pan hard bars, springs and end links done.  So productive weekend for sure, got a lot done. 

Rear suspension parts:
KING KTRS-79 Coils
Rear - Lateral pan hard bar OEM (48740-60080)
Rear - Lower OEM (48720-60040) x 2

Parts I forgot to take with me to install so going to do that later.
Rear - Upper Right (Air box side) OEM (48710-60070)
Rear - Upper Left OEM (48710-60080)


New headers.


New Diff bushings


New transmission mount


New motor mounts


New end links front and rear


New lower control arms, pan hard bars and King springs.


Bye bye, old parts you've served the LX well. 


-AJ Abraham


Follow me on Instagram:
@flawless_fitment
@aj_ls460
@aj_lx470 
@aj_sc430